 Integration Docs
Guide to Integrating KR/US in Google AdMob or Google Ad Manager for Pangle
Key changes
- New: Pangle US SDK and Pangle KR SDK are now live, alongside Pangle ROW SDK. (“Pangle US SDK” and “Pangle KR SDK” are the names configured in the AdMob dashboard. In the actual code integration, there is no need to integrate multiple Pangle SDKs.)
- Separate configuration: US / KR do not automatically inherit ROW mappings and need to be configured separately.
- Version requirement: Please use Pangle SDK v7.2.0.2 or above. (Only Pangle US has version requirements; Pangle KR has no version requirements)
Overview
Pangle Bidding has now been split by region. Please configure the newly added Bidding Ad Source directly in Google AdMob or Google Ad Manager.
Ad source | Supported ad formats | Description |
Pangle ROW SDK | Banner, Interstitial, Rewarded, Native, App Open | Existing Bidding source |
Pangle US SDK | Interstitial, Rewarded | New, for US traffic |
Pangle KR SDK | Banner, Interstitial, Rewarded, Native, App Open | New, for Korea traffic |
Before you start
- Confirm that the app has integrated Pangle SDK v7.2.0.2 or later. (Only Pangle US has version requirements; Pangle KR has no version requirements)
- Prepare the corresponding Pangle App ID and Placement ID.
Google AdMob configuration
1. Add a new Pangle bidding ad source
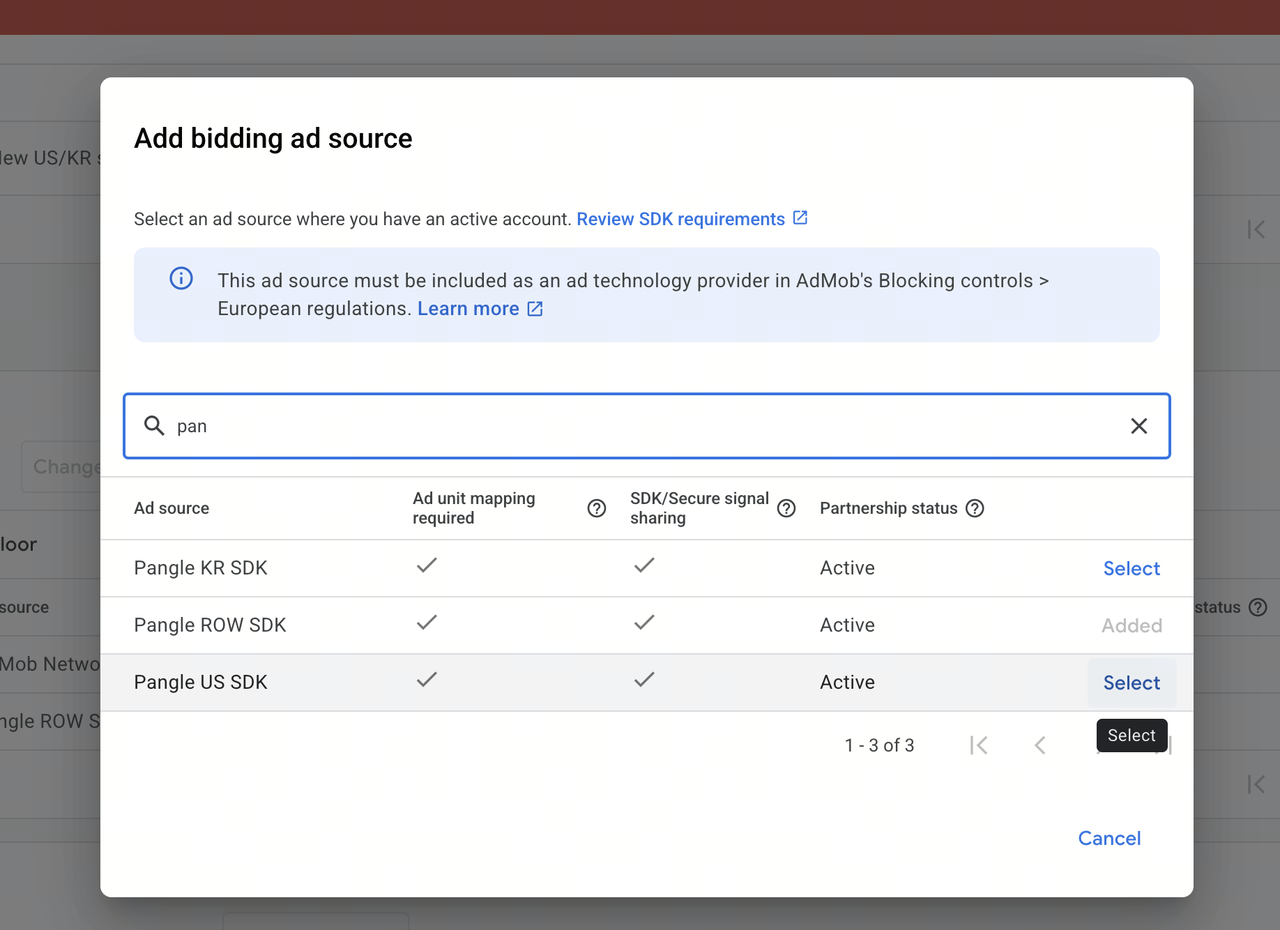
Go to Mediation > Bidding sources and add Pangle US SDK or Pangle KR SDK. If prompted, enable the partnership first. (“Pangle US SDK” and “Pangle KR SDK” are the names configured in the AdMob dashboard. In the actual code integration, there is no need to integrate multiple Pangle SDKs.)
UI example: Search for Pangle, then select the corresponding US / KR seat.
2. Complete ad unit mapping
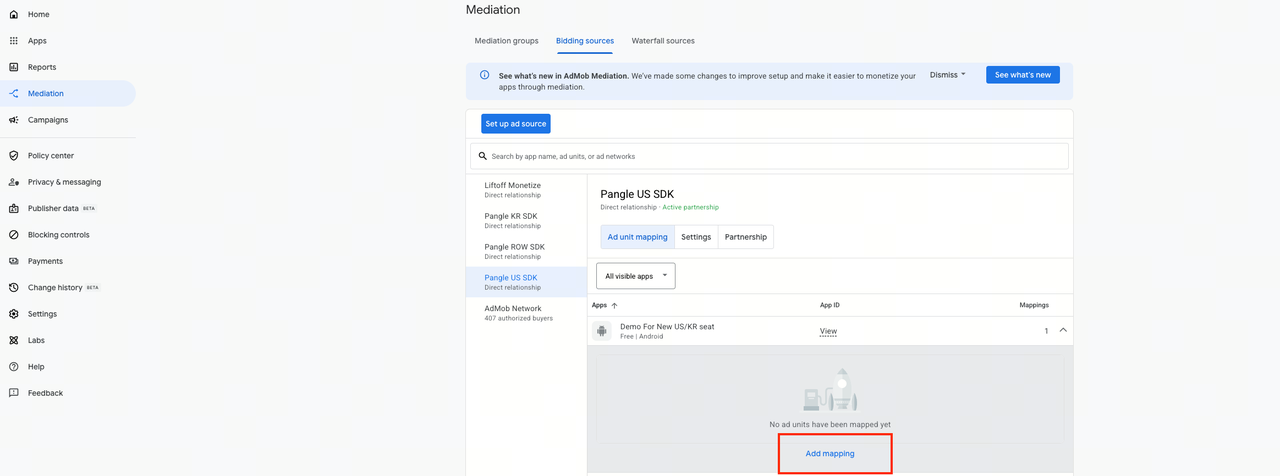
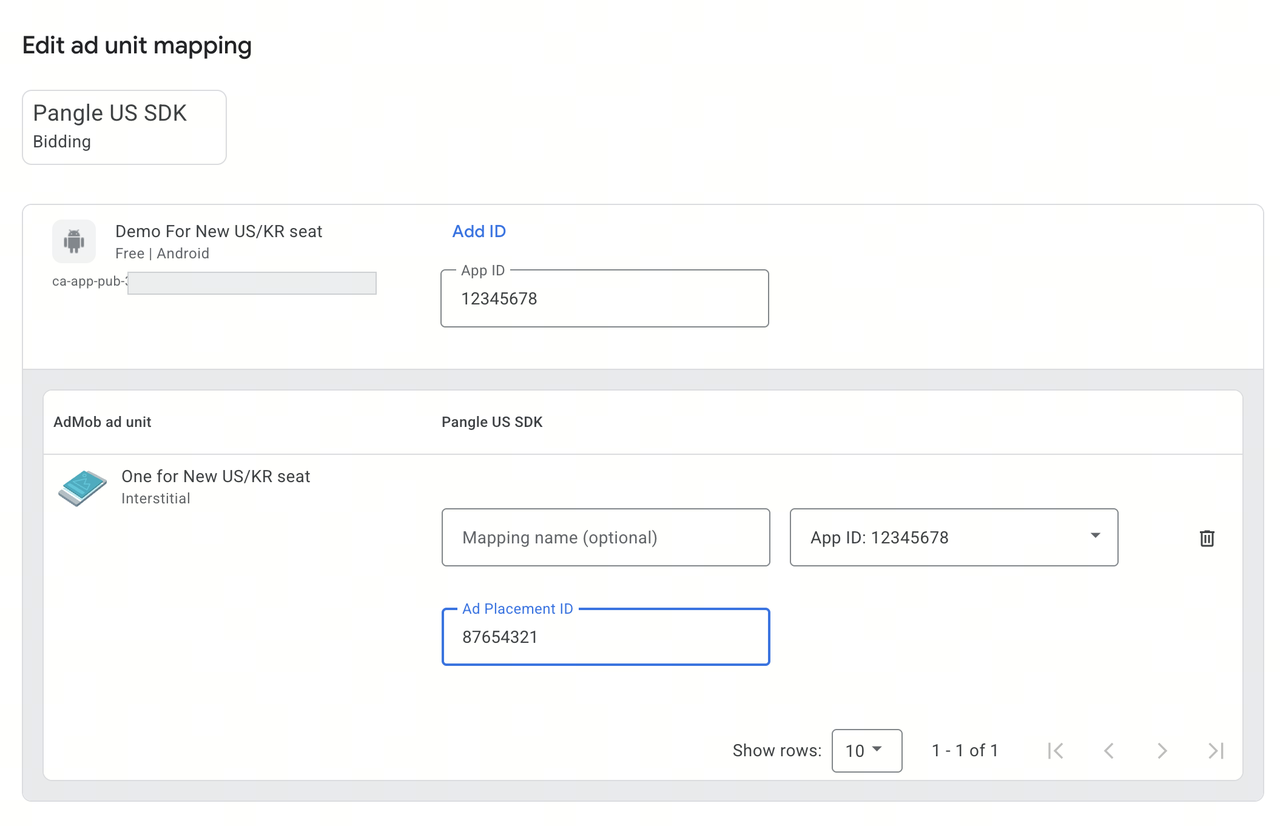
Open the newly added ad source and configure the corresponding Pangle placement ID for each AdMob ad unit.
UI example: First enter the seat list, then click Add mapping.
UI example: Enter the App ID and Placement ID on the mapping page. Configure ad unit mapping for the new seat; if you already use ROW, you can reuse the existing mapping list or CSV as a reference.
3. Add to Mediation Group
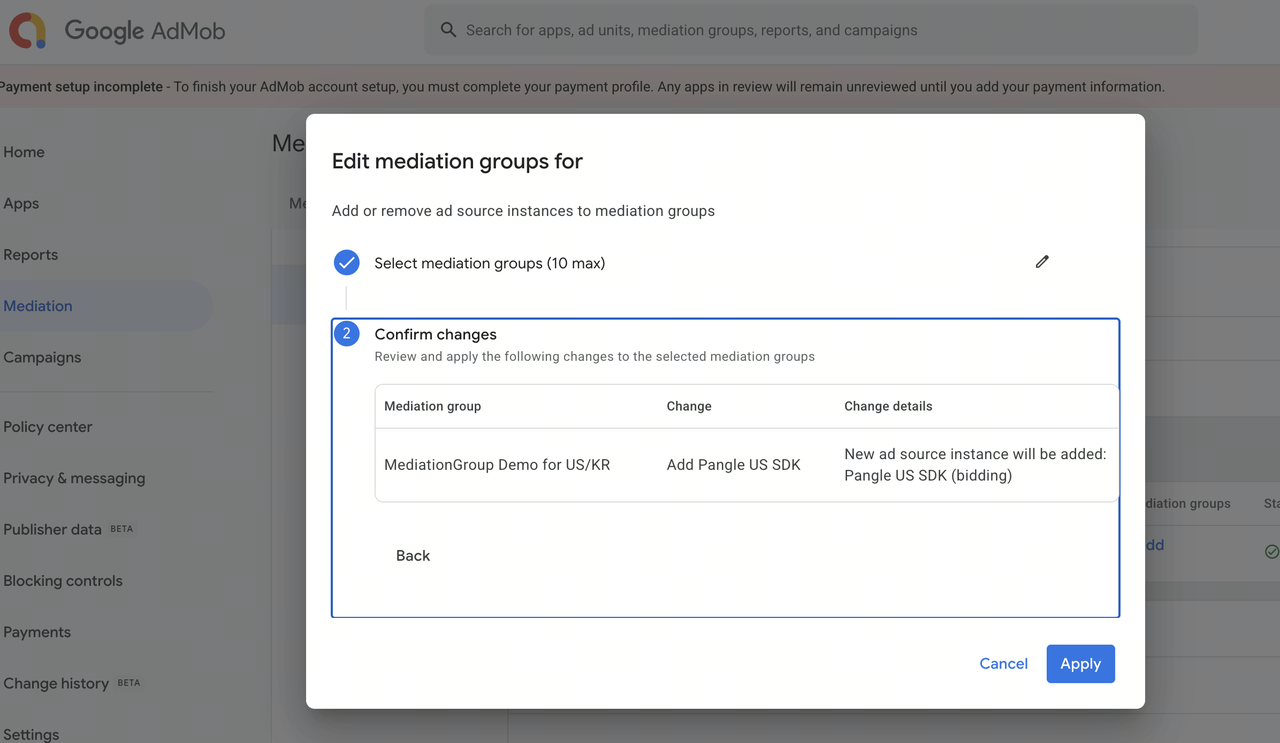
After completing mapping, add this seat to the target Mediation Group; otherwise, it will not actually participate in bidding.
UI example: Confirm that Pangle US SDK / KR SDK is added to the corresponding Group.
Google Ad Manager configuration
UI example: On the SDK Bidding / Bidders page, you can see the three related seats: Pangle, Pangle Korea SDK, and Pangle US SDK.
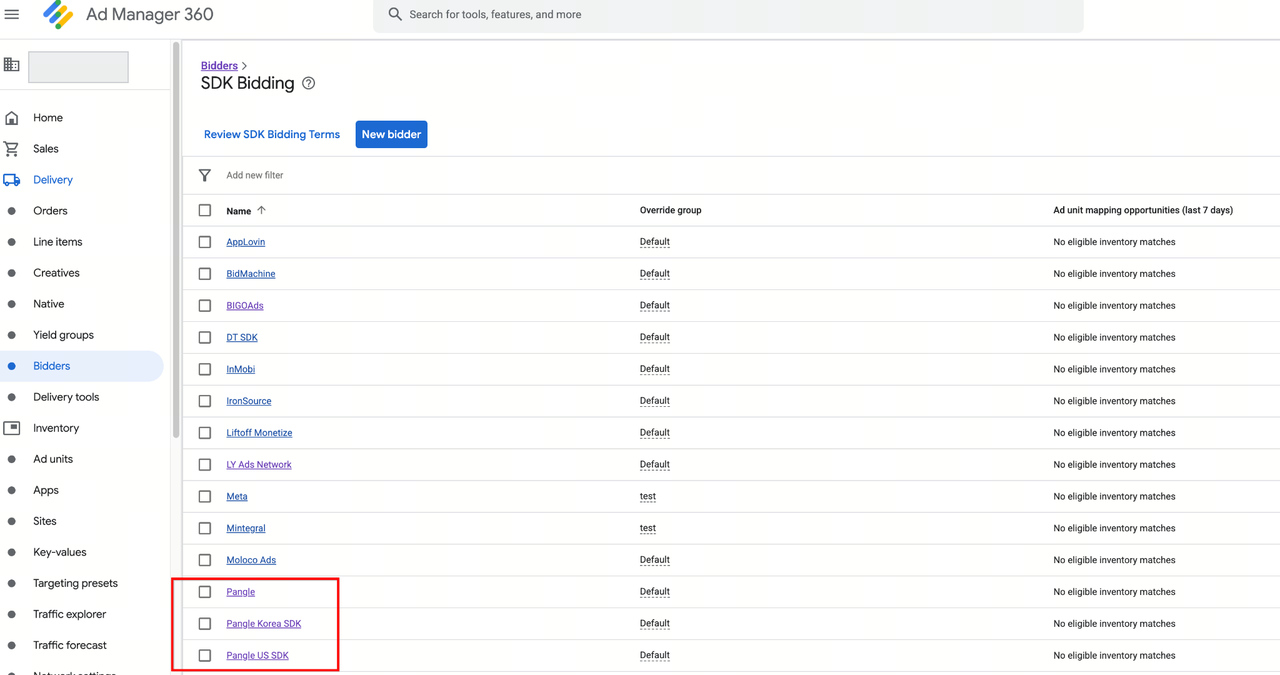
- Go to Delivery > Yield groups or Companies and add the new Pangle KR/US.
- Turn on Allow SDK Bidding.
- Enable Secure Signals.
- Configure ad unit mapping for the new seat; if you already use ROW, you can reuse the existing mapping list or CSV as a reference.
If you manage both Google AdMob or Google Ad Manager, you can follow the same workflow: Add new seat → Enable SDK bidding / partnership → Complete mapping → Update group → Verify traffic.
 Linkedin
 Facebook
 Sign up newsletter